Extracting custom actions from a WiX msi installer
Introduction
This was originally written at the end of 2024. Many changes have been made to Paxton10 so this may nolonger be accurate. However the focus is more on extracting WiX installers and using orca to inspect custom actions in msi files rather than the specific case of paxton10 update installer.
As part of an ongoing investigation into the Paxton10 access control system I took a look at how the Paxton10 server generated its TLS certificates and specifically at the root CA cert and the password for the private key. The issues uncovered had already been discovered on the Net2 system and written up by my friend Craig. Paxton10 seems to have inherited this issue including the same password. This writeup will focus on the process of extracting custom actions from a WiX installer as I found that interesting.
What creates the certs?
Searching for files on a server bought from eBay turned up two batch files in “C:\Program Files\Paxton Access\Dms\openssl” that created certificates if they didn’t exist.
However the password for the private key was supplied to these batch files as an argument as they are basically the same as in the Net2 writeup above.
A bit more searching showed these files were installed by the nginx.msi package of the server update. Even more searching turned up installation logs in
“C:\Users\Administrator\AppData\Local\Temp\dms_setup_20220822141332_004_nginx.log”.
This contained the password for the private key as the full command line generating the server cert had been logged to the file.
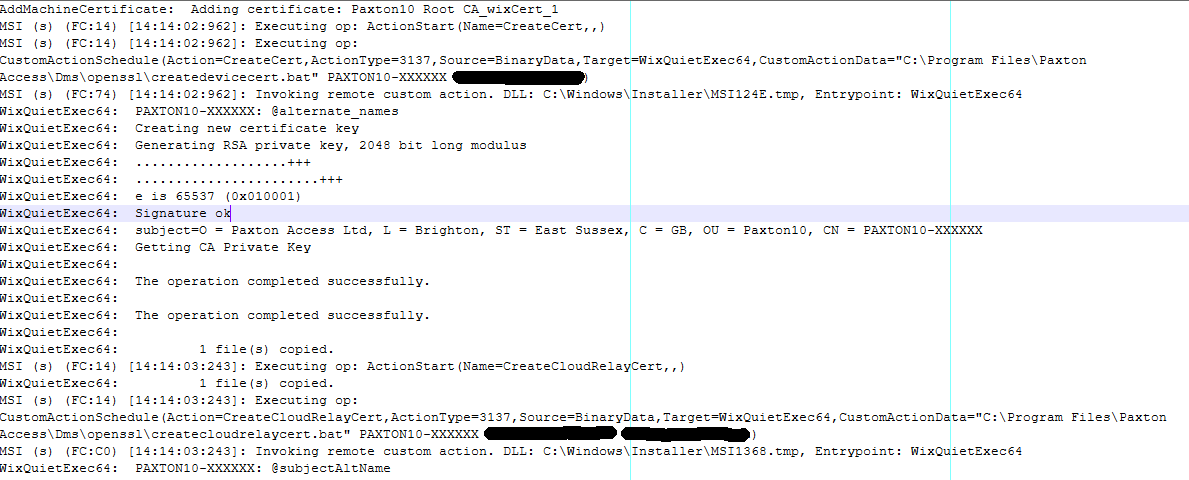 CWE-532: Insertion of Sensitive Information into Log File
At this point the passwords are now known and you could stop looking but where do these passwords actually come from and where are the batch files called from? The log file makes it clear that the batch files are being run as part of the installation process so it is something in the msi file that is running them.
A closer look at WiX msi files
It seems that WiX msi files are more than just an archive and can have custom actions and run code during the install process. A google search turned up a page on how to extract and inspect these actions.
https://markcz.wordpress.com/2016/09/07/inspecting-wix-managed-custom-actions/
I ran into issues with both dependency walker and 7zip failing to extract the cab in the dll so the guide below is slightly different but the same basic process.
Find the msi to extract
There are a couple of ways to get the .msi so it can be examined. Initial searches for the string “createdevicecert.bat” found a cached version in C:\Windows\Installer\5ab7d.msi or it can be extracted from the update installer Setup.exe. When the server performs a software update it downloads the update to C:\Dms Database\PendingInstall\Setup.exe this is a WiX installer and can be extracted using WiX tools.
Extract WiX installer
If you don’t have .Net SDK installed download and install it from Microsoft. The Wix tool can then be installed from a cmd prompt with
dotnet tool install --global wix
The Setup.exe can now be extracted using the wix burn command
wix burn extract -o extracted -oba extractedba Setup.exe
This will create the directory “extractedba” which contains the bootstrapper application and isn’t important except it needs to be extracted to get the filenames correct and the directory “extracted” which contains all the installers files. nginx.msi will be in extracted\WixAttachedContainer\Redist
Inspect the msi with ORCA
Microsoft provide a tool Orca.exe to inspect msi packages as part of the Windows SDK components. To install this download the SDK installer run winsdksetup.exe and select only “MSI Tools” then click download, the installer will tell you it had downloaded the files to “C:\Users\%username%\Downloads\Windows Kits\10\WindowsSDK”. In the Installers subdirectory of this will be “Orca-x86_en-us.msi”. Install this and you should now be able to right click on the nginx.msi and select “Edit with Orca” to inspect the installer.
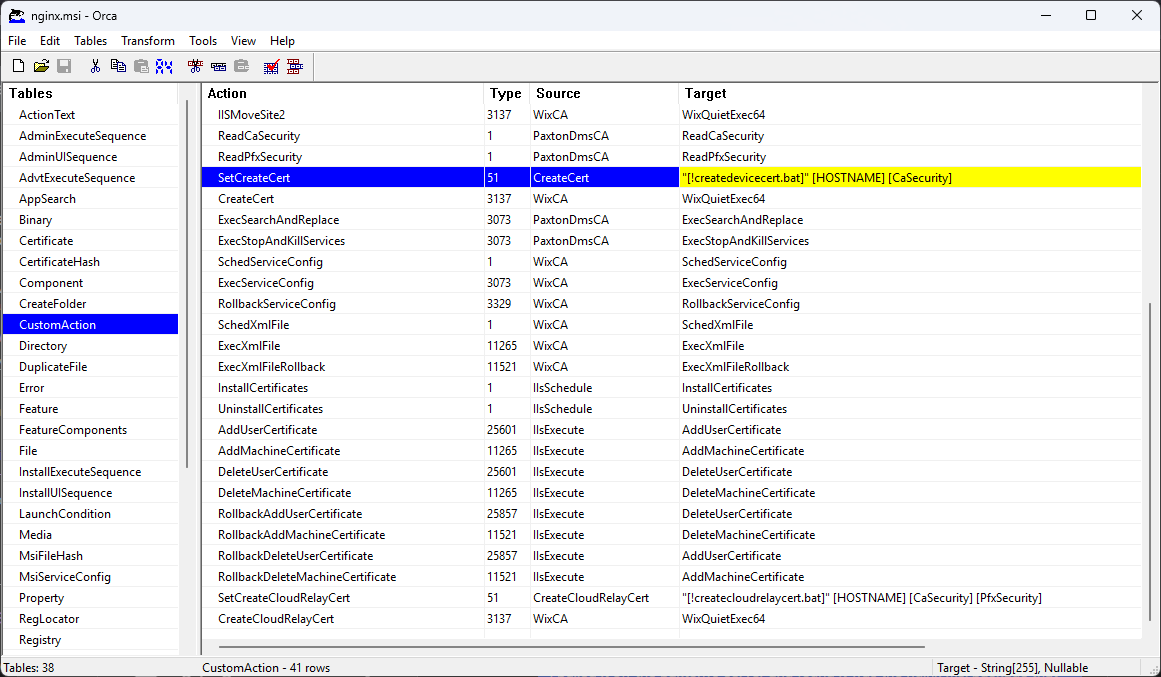 ORCA showing the CustomAction table
Viewing the CustomAction table showed this is where the batch files get called from but the arguments seem to be coming from ReadCaSecurity in the PaxtonDmsCA binary. To extract this select the Binary table on the left and then from the Tables menu select export tables and save them somewhere.
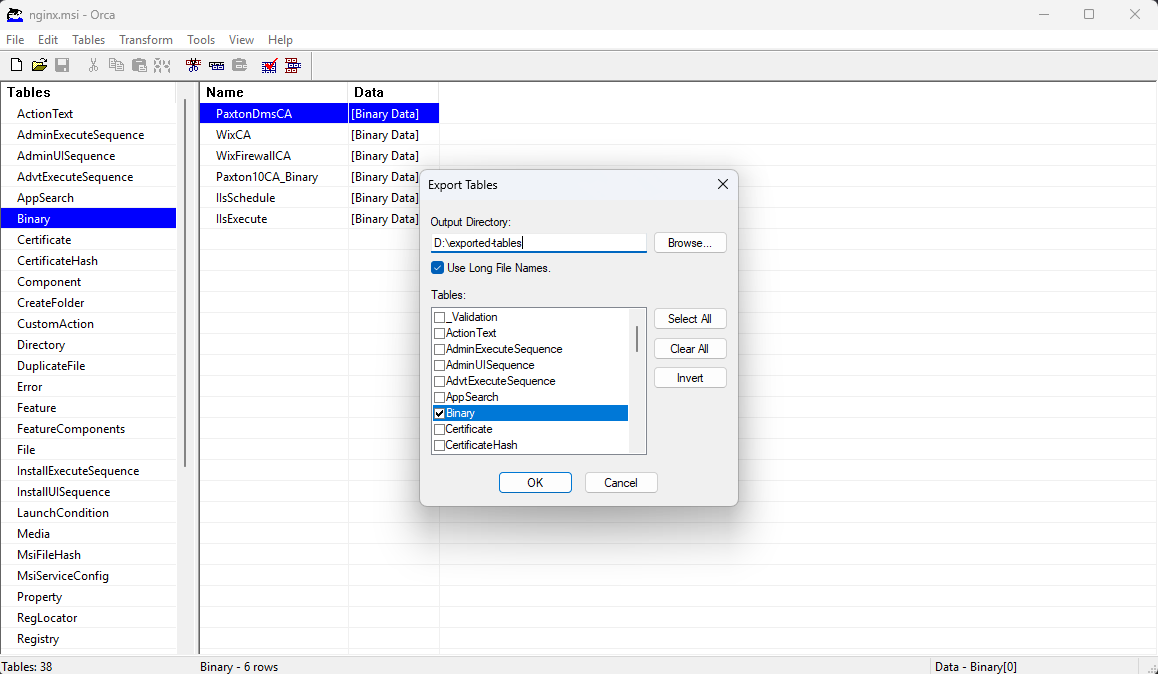 ORCA exporting Binary tables
The file of interest in this case is PaxtonDmsCA.ibd which is an SfxCA.dll that has the custom action in a cab file appended to it. 7zip wouldn’t extract it but using binwalk in a WSL window did.
binwalk -e PaxtonDmsCA.ibd
This should then give you the actual custom action Paxton.Dms.CustomAction.dll in the binwalk output directory.
 cab extracted with binwalk
dotpeek/dnSpyEx
With the actual .net dll extracted it can now be decompiled with your favourite .net decompiler such as dotPeek, dnSpyEx or ILSpy and the secret passwords revealed. In this case it was academic as there are other ways to find these but I wanted to investigate msi files and how they worked as I had previously incorrectly assumed they were just archive files.
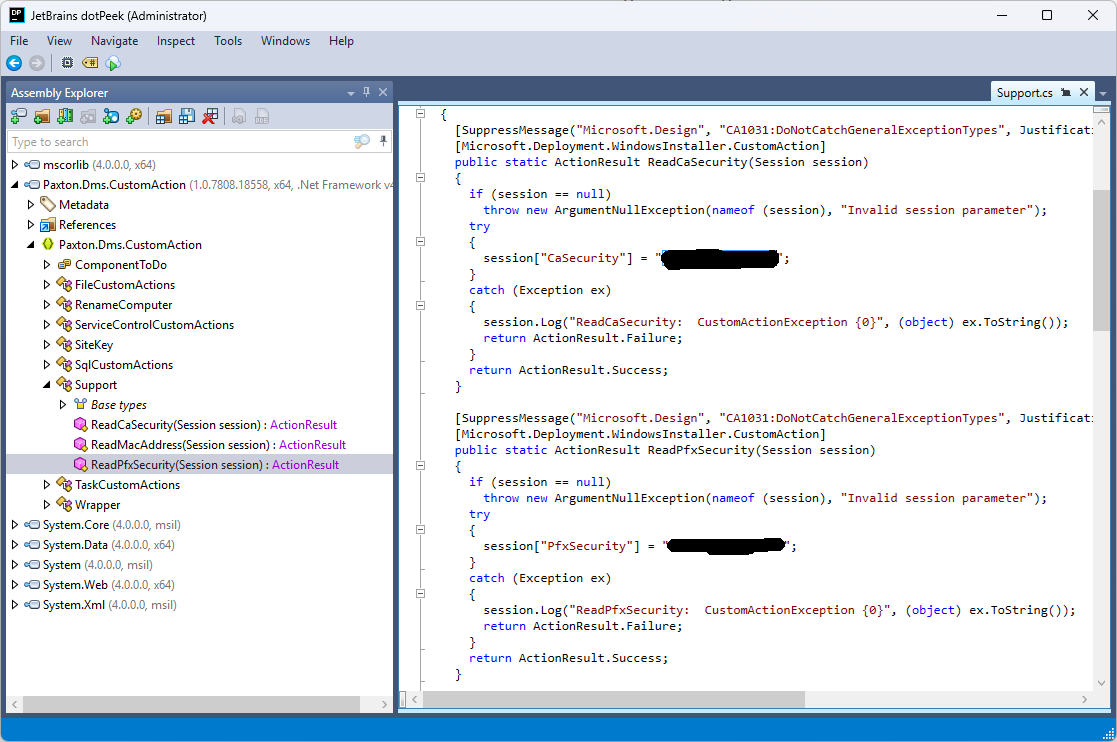 The passwords in dotPeek
I’m sure this can’t be the only example of sensitive actions being performed at install time so it might be worth having a look the next time you are looking at an msi installer.